Grab 1 OF My Blinkies


My Logo

My Licenses


ChocUkDesigns On Facebook


Thursday 20 February 2014
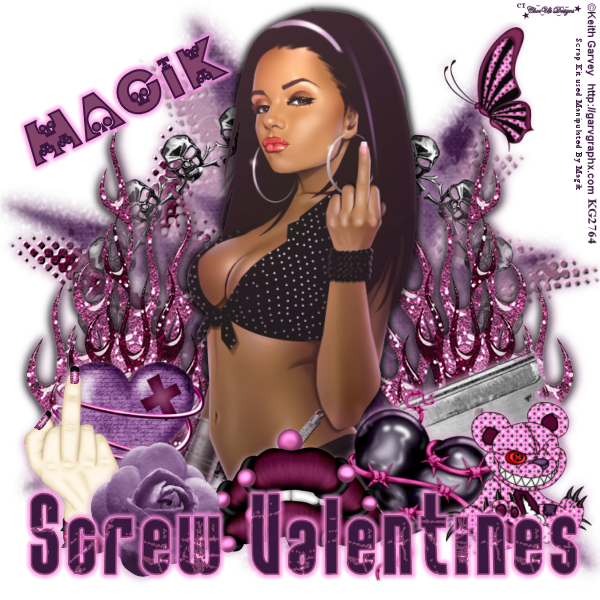
CT ChocUkDesigns For Manipulated By Magik PTU Tutorial For Screw Valentines Scrap Kit
CT ChocUkDesigns For Manipulated By Magik
PTU Tutorial
For Screw Valentines Scrap Kit


DO NOT COPY AND SHARE
PLEASE DIRECT PEOPLE TO MY BLOG
DO NOT CLAIM AS YOUR OWN
Supplies Need:-
Manipulated By Magik - Screw Valentines
You Can Purchase this Awesome kit At
PicsForDesigns
or
Mystical Scraps
or
Thrify Scraps
Tube: Of Choice
I Have Used Keith Garvey - Finger
You Can Purchase This Tube At His Store
Please Note You Need A License To Use This Tube
Mask: Vix_Mask374
Which You Download From Her Blog
Creative Misfits - Nicole - Mask 2
Which You Download From Their Blog
Plug Ins:
EyeCandy 4000 - Gradient Glow
MuRa's Seamless - Emboss At Aplha
A Working knowledge Of PSP
Lets Begin With My Tutorial
Open PSP and your Tube and Mask.
Open a New 600 x 600 Resolution 200
Open and Copy Frame 5
Paste as new Layer and resize By 85%
Add The Following Drop Shadow:-
V&H: 2, Op: 100, Blur: 10 and Color: #d4adcc
Repeat with V&H: -2
Copy and Paste Your Tube as a new layer
Rezise By 85% and Move To Center Of Frame
Add The Following Drop Shadow:-
V&H: 2, Op: 100, Blur: 10 and Color: Black
Repeat with V&H: -2
Open and Copy Flames
Paste as new layer and move to left hand side of tube
See Mine For Placement
Layers - Arrange - Move Down
Repeat Drop Shadow as used on your Tube
Layers - Duplicate - Mirror
Open and Copy The Following Elements
Adding The Following Drop Shadow:-
V&H: 2, Op: 100, Blur: 10 and Color: #d4adcc
Repeat with V&H: -2
Pierced Lips - Resize By 45%
Flower - Resize By 45%
Eff You - Resize By 45%
Blade - Resize By 40% - Free Rotate By 22 Degrees
Wired Heart - Resize By 45%
Barbed Wire Heart - Resize By 45% - Free Rotate Right By 22 Degrees
Bear - Mirror - Resize By 40%
Butterfly - Resize By 35% - Mirror
Activate Top Layer (If Not Already Activated)
Activate Text Tool
Select Font Rock It, Size 26 Stroke 2 and Bold
Foreground Color - #c06db0
Background Color - #3a183f
Type - Screw Valentines
Place on Tag Along The Bottom Of Canvas
Convert Layer to Raster
Eyecandy 4000 - Gradient Glow
Color: #c06db0
Glow Width: 5.27
Soft Corners: 25
Overall Op: 100
Draw Only Outside Selection Checked
Open Paper 9
Layers - Promote Background Layer Top Raster
Layers - New Mask Layer - From Image - Select Vix_Mask374
Make Sure Source Luminance Is Check and Invert Mask Data Is not checked
Copy Merged and Paste as new raster on working image
Layers Arrange Send To Bottom
Resize By 75%
Plug In - MuRa's Seamless - Emboss At Alpha
Base Color R: 128
Base Color G: 128
Base Color B: 128
Emboss: 64
Base <-> Source: 255
Opaque Emboss: 128
Repeat Plug In x2
Add Drop Shadow As Used On The Elements
Open Paper 8
Layers - Promote Background Layer Top Raster
Layers - New Mask Layer - From Image - Select Nicole - Mask 2
Make Sure Source Luminance Is Check and Invert Mask Data Is not checked
Copy Merged and Paste as new raster on working image
Resize By 85%
Repeat Drop Shadow Again
Layers New Raster Layer - Add All Copyright Info or Credits
Layers New Raster Layer - Add Watermark
Activate Text Tool
Select Font Skullphabet, Size 40 Stroke 2 and Bold
Foreground Color - #3a183f
Background Color - #84436a
Type Your Name
Place on Tag where Desired
Convert Layer to Raster
Repeat EyeCandy 4000 Gradient Glow with Same Settings as above
Save as Png and Name Your Tag
All Done!!!
Thank you very much for following my Tutorial
I would love to see your results
and
any feedback
Please Email Me
At
Dont Forget To Check-Out Maigk's Blog
Tutorial Written By ChocUkDesigns
Retained by "Copyright © ChocUkDesigns 2014 All rights Reserved"
M09H-994G-X9ZS-WGC0
Subscribe to:
Post Comments
(Atom)
Copyrighted

My Stores


My CT


Who I CT For


Who I Guest CT For

CTs I Manage
CU License


0 comments:
Post a Comment